Friday, November 17, 2017
Category: News
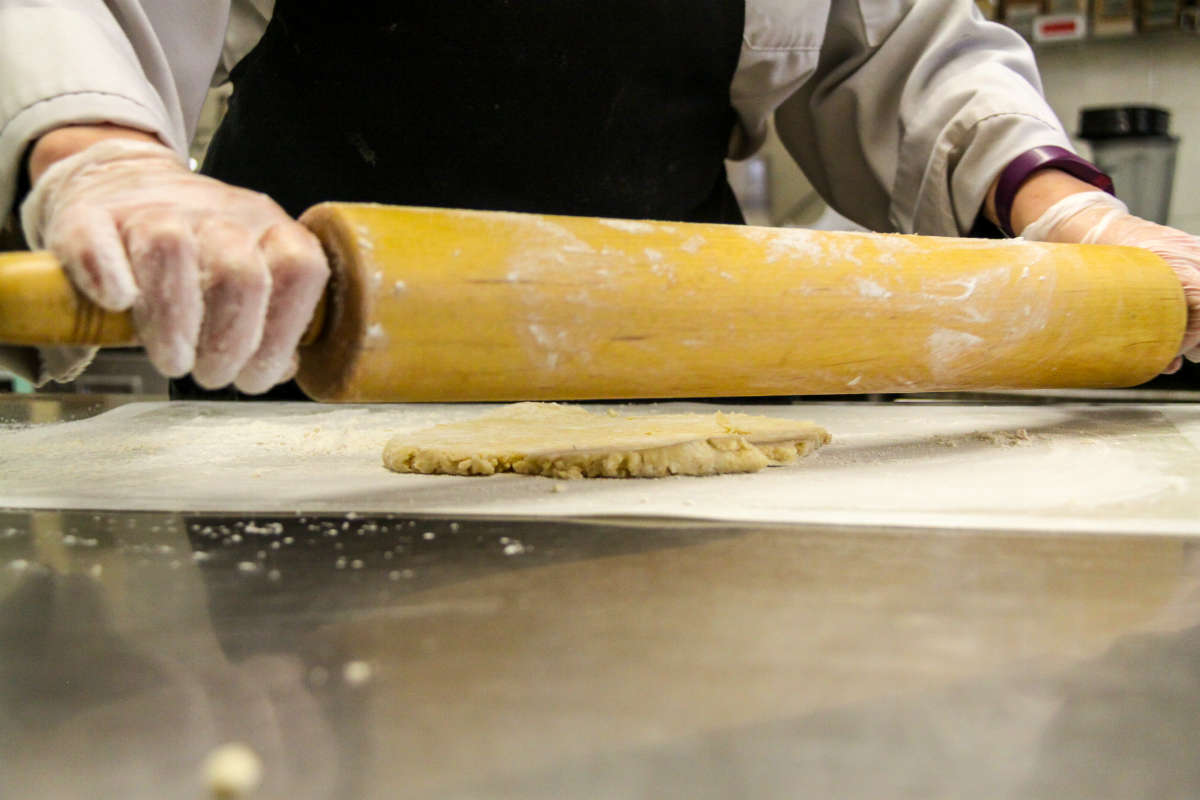
The perfect pie: how to make a great crust
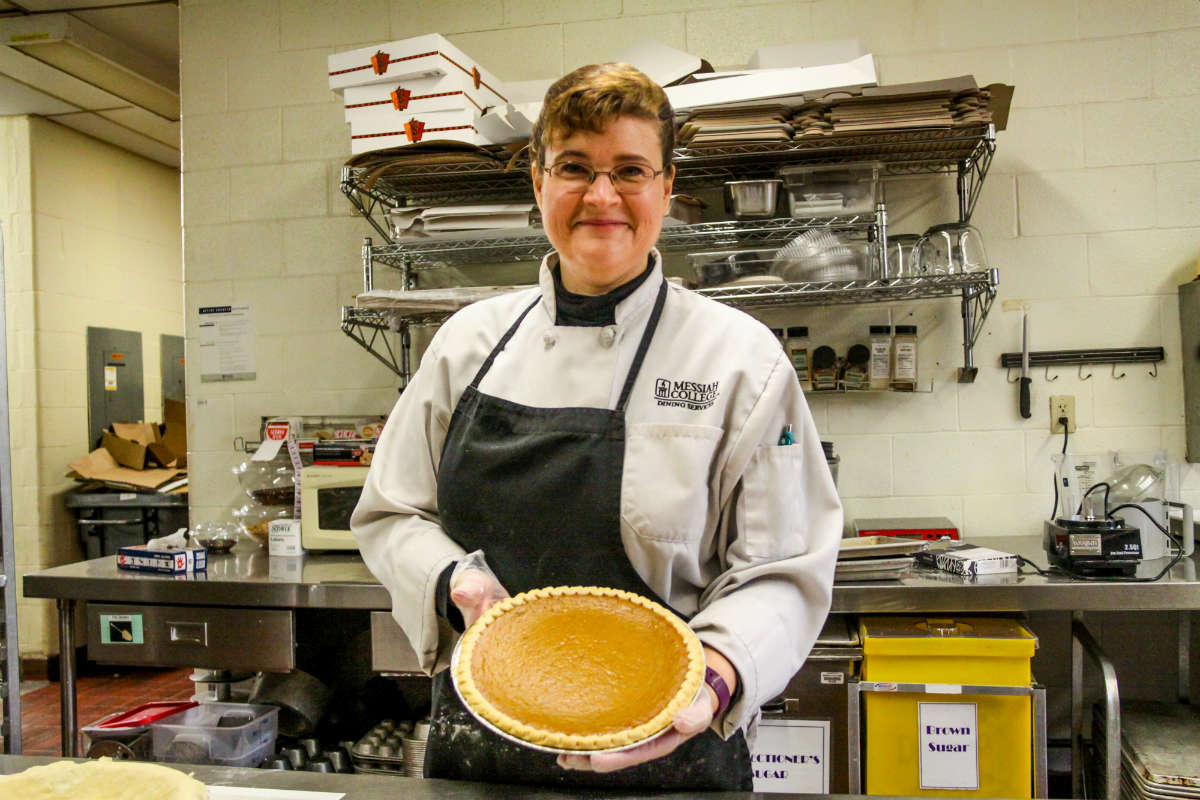
Thanksgiving is coming up, and there’s a good chance pie is on your dessert menu. For the baking novice, making a pie crust can be intimidating. Beverly Spangler, a pastry chef at Messiah College in Mechanicsburg, Pennsylvania, knows a few tips and tricks that are sure to make your results delicious.
Spangler says shortening, rather than all butter, helps the dough hold it shape since it has a higher melting point than butter. What’s her secret? Several hours before making the dough—or better yet, the day before—measure the shortening and freeze it. “I like to press it into a flat disc between two pieces of plastic wrap,” she adds. “Pie crust dough is best when it can sit before using, preferably overnight or for at least four hours, before rolling.” So be sure to begin about two days before the big day to get the perfect crust.
Pie crust
- 6 Tbsp. shortening, frozen
- ½ C. ice water
- 2 ½ C. all-purpose flour
- 6 Tbsp. butter, chilled
- 2 Tbsp. granulated sugar
- ¼ tsp. salt
-
Fill a glass or measuring cup with at least ½ cup of water and ice cubes. Let it sit while you prepare the rest of the dough.
-
In a mixing bowl, lightly blend the flour, sugar and salt.
-
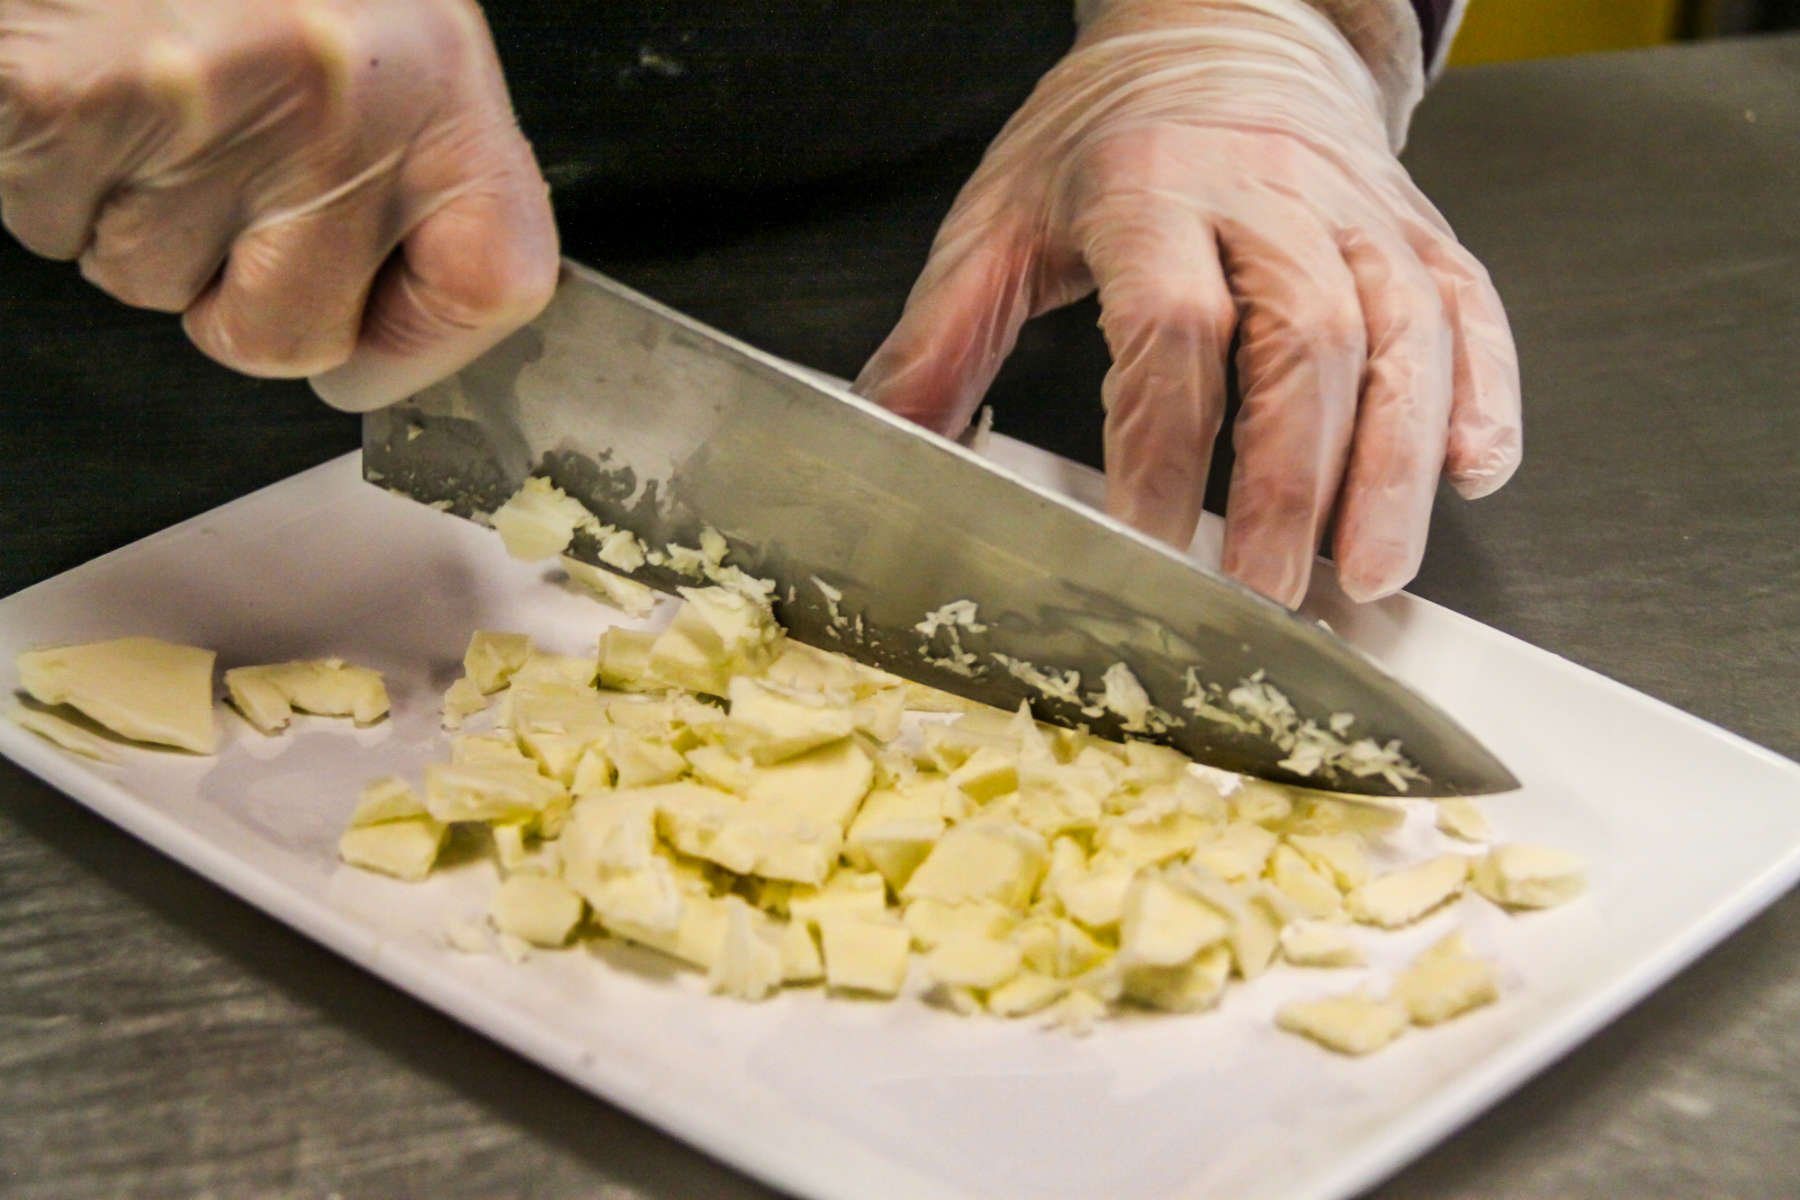
Cut the chilled butter and frozen shortening into small pieces and place on top of the flour mixture. With a pastry blender, cut the butter and shortening into the flour. (Tip: you can also use two forks or two knives, or carefully use a food processor on pulse.) The goal is to coat each piece of fat with flour without breaking down the fat, so be extra careful not to overmix. Cutting in the fats is what will ultimately result in lovely pastry layers. When the dough is baked, the fat will dissolve and the pocket that remains creates the airy pastry layers.
-
When your dough has a mealy texture, measure ½ cup of ice water from your glass (you do not want any ice cubes). Pour the ice water over the crumbs and gently mix until the dough just comes together. It will look crumbly!
-
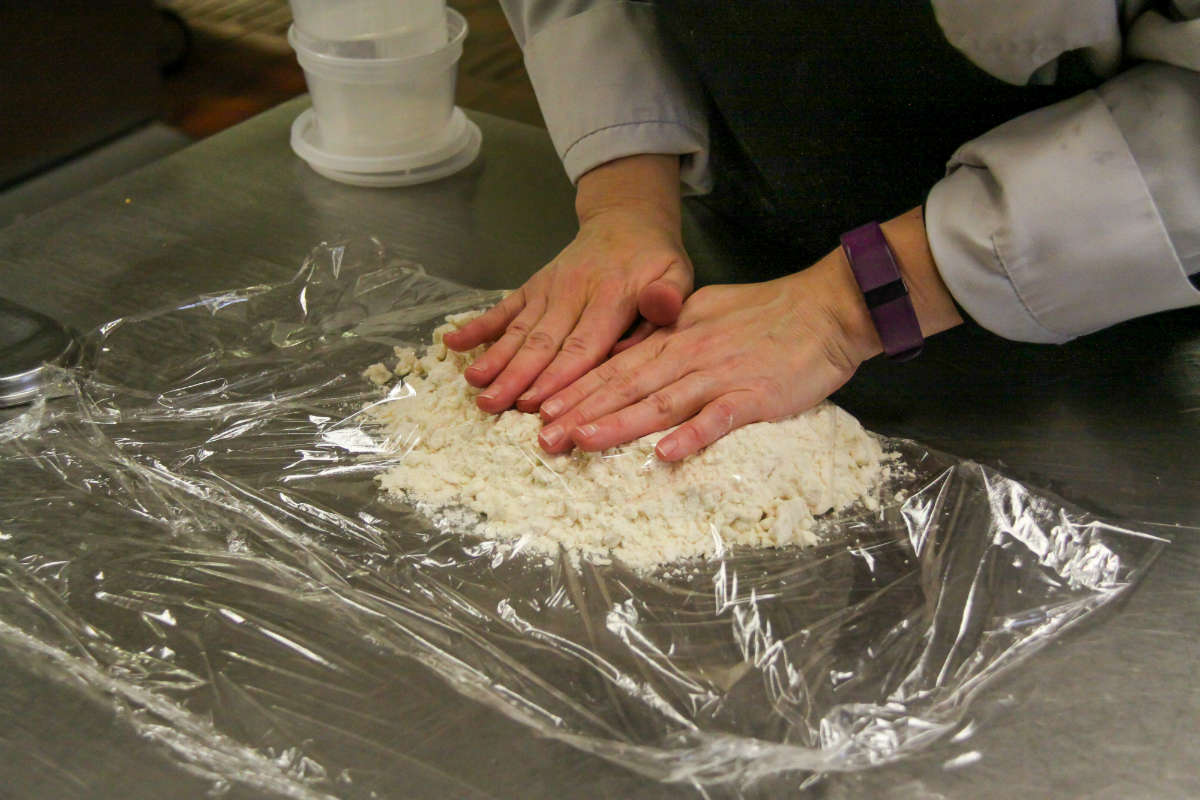
Lay a large piece of plastic wrap on your work surface and pour the dough onto the plastic wrap. Gently press it together. Wrap well and refrigerate at least four hours or overnight.
-
When you are ready to use, let the dough rest at room temperature about an hour until it is soft enough to roll. Divide the dough in half and roll it out on a floured surface with a floured rolling pin. When the dough is slightly larger than your pie plate, gently fold the dough in half and then half again to lift it into the pie plate. Unfold it and gently ease it into place.
-
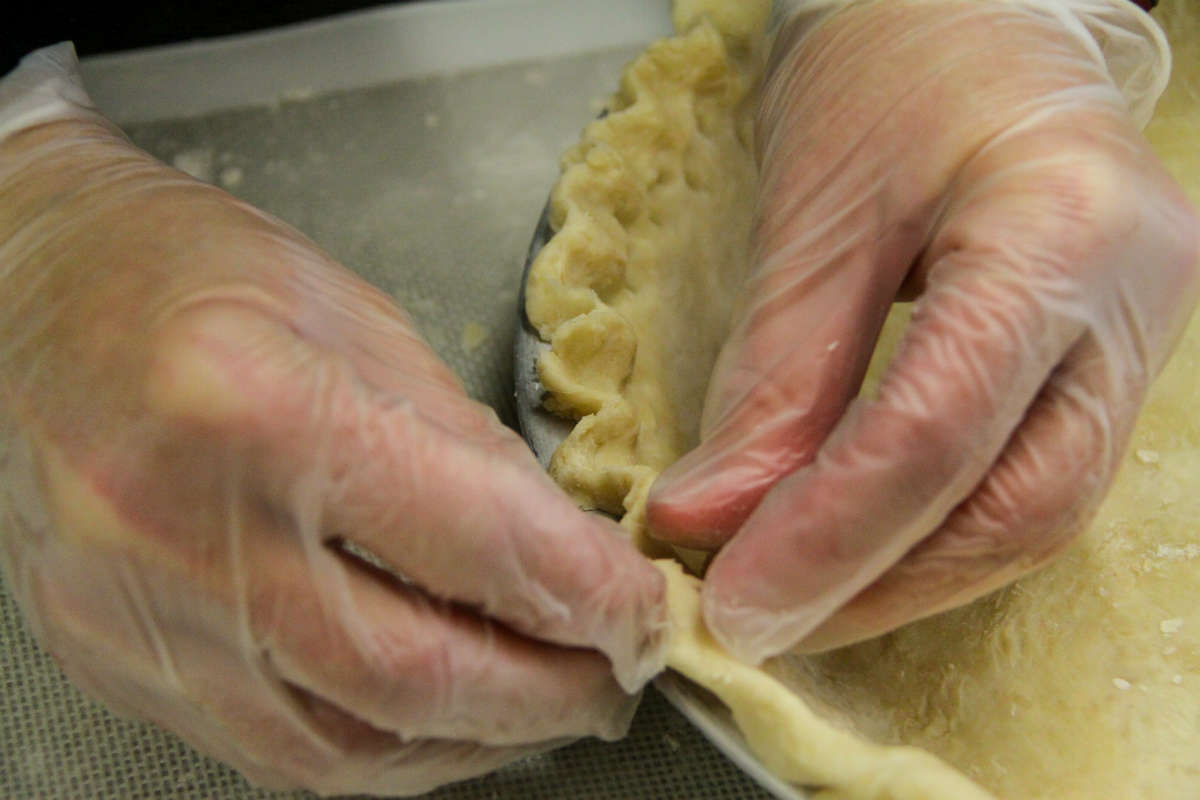
Using scissors, trim the excess dough around the edge and flute the edge of the dough using your fingers or a fork. Follow your pie filling recipe, either baking the crust partially before filling or filling and baking. (Tip: glass pie plates do not tend to work well for baked pie crusts, as they do not generate enough heat to properly cook and brown the bottom.)